Wilderness Medicine Training Center International
  • Home
  • About Us
    • Mission, Vision, History, & Educational Strategies
    • Staff Profiles
  • Course Descriptions
  • Course Schedule
  • Recertification
  • Sponsor a Course
  • Store
  • Resources
    • Downloads
    • Links
    • Candidate Login
    • Instructor Login
  • Certification Database
  • Additional Services
    • Affiliate Program
    • Consulting
  • Contact Us
  • Blog
  • WMTC Japan
  • WMTC Colombia
  • COVID-19

Blog

Assessing & Treating Pelvic Injuries in the Field

12/24/2016

0 Comments

 
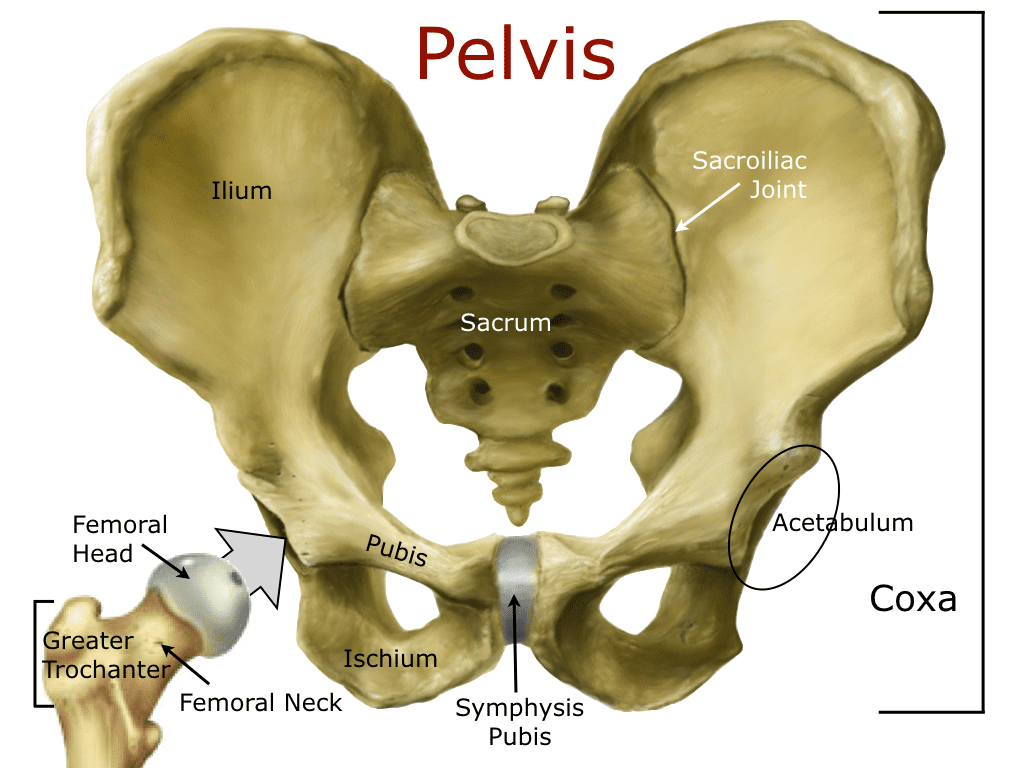
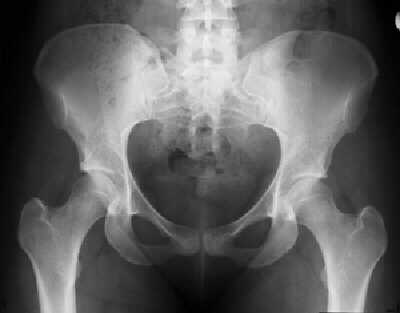
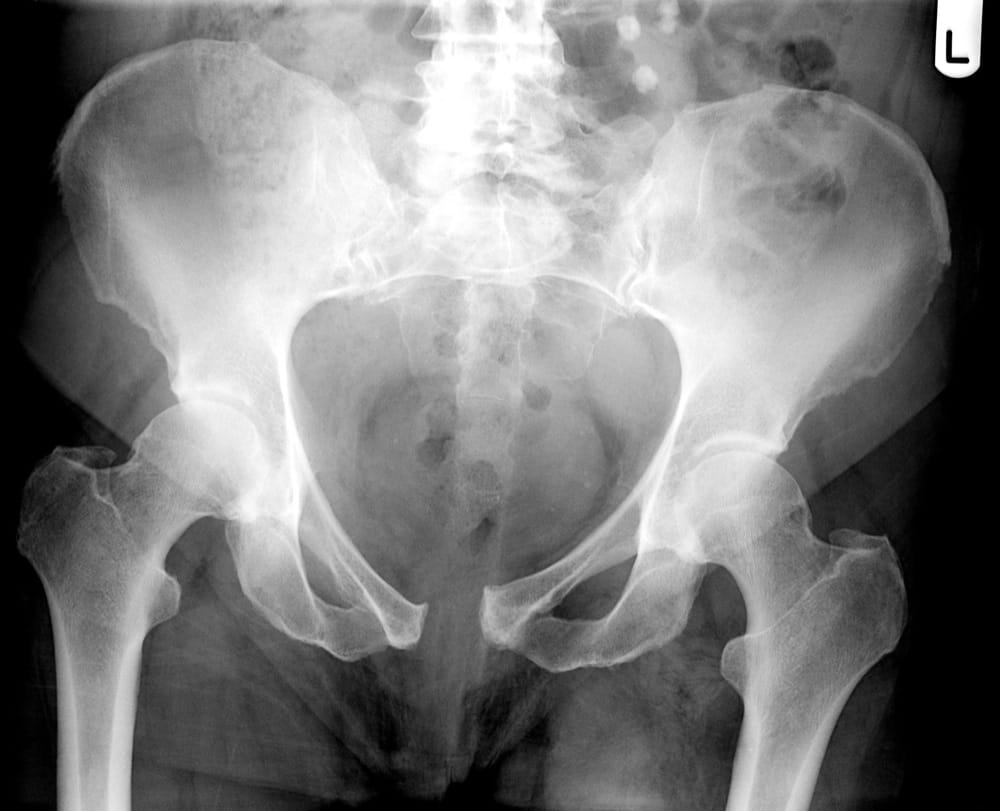
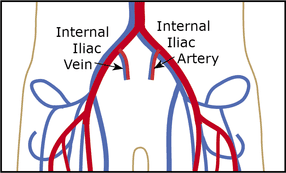
Introduction
The pelvis is an integral part of the human skeletal system and contains some of the largest bones in the body. Structurally, it connects the lumbar spine to the lower extremities and carries and supports the abdominal organs. Its right and left sides (coaxe) are formed by the fused bones of the ilium, ischium, and pubis; an outside socket on each coxa (the acetabulum) holds the femoral head. Internal ligaments connect the sacrum to both sides in the back at the sacroiliac joint and to one another in the front at the symphysis pubis to form a circle. When intact, the combination of bones and ligaments create an amazingly strong structure capable of withstanding a significant amount of pressure.

That said, fractures and ligament damage can occur. While most pelvic injuries are minor, a few can cause severe internal hemorrhage and death. Fractures of the two rings (rami) at the bottom of the pelvis and fractures of the iliac wing, although painful, are rarely serious. On the other hand, fractures of the sacrum or ilium, separation of the symphysis pubis, or tears to major pelvic ligaments that cause the pelvis to open like a book, shear vertically, or compress inward may cause massive internal bleeding and are usually life-threatening.

Most serious pelvic injuries are caused by high energy events: falls from a height, motor vehicle accidents, and crush injuries. While torn ligaments can bleed profusely, the majority of bleeding associated with pelvic injuries is typically venous bleeding directly from the fracture site. Arterial bleeding is rare and usually leads rapidly to death from volume shock. Blood accumulates in the retroperitoneal space (which is capable of holding up to four liters) and if the pressure is great enough, may also track into the abdomen; genitourinary and gastrointestinal damage often accompany seriour pelvic injuries. Internal volume and bleeding increase with open-book injuries as the coxae splay backward. Click on an image to enlarge.

Picture
Picture
Normal, intact pelvis.
Picture
Open book pelvic fracture.
It's worth noting that the force required to cause a serious pelvic injury makes associated traumatic injuries common: over 90% of patient's with pelvic ring injuries also have head or chest injuries. The majority of these multi-trauma patients will die if their injuries occur in a remote setting where Advanced Life Support and rapid transport are unavailable. For those that survive, recovery is a long-term process and fraught with complications.
Picture
The internal iliac artery supplies the walls and viscera of the pelvis, the buttock, the reproductive organs, and part of the thigh.
Picture
Assessment
Assessment of pelvic injuries begins with a close examination of the MOI; low energy events are unlikely to produce serious injuries. In the backcountry, falls from a height, high speed bicycle and ski/snowboard crashes, and avalanche are often mechanisms. Significant pelvic injuries are accompanied by severe pain and patients often faint (secondary to a parasympathetic autonomic stress response).

It's vital to avoid extraneous pelvic movement during the physical exam: rocking the patient's pelvis or rolling them onto their side may displace fractured bones, disrupt clotting, and increase local both damage and bleeding. Closely monitor the patient's pulse, blood pressure (if possible), and level of consciousness for the classic clinical pattern of internal bleeding and volume shock:

Initially (early volume shock), as the patient bleeds internally, they are awake with increasing levels of anxiety with:
  • increasing pulse and respiratory rates
  • normal blood pressure
  • pale to cyanotic skin

As bleeding continues (late volume shock), the patient will become voice responsive, pain responsive, and eventually unresponsive with:
  • dramatically increasing pulse and respiratory rates
  • falling blood pressure
  • severe cyanosis
  • cardiac arrest will ensue if bleeding continues

Things to consider during your physical exam:
  •   Internal bleeding secondary to a pelvic fracture commonly occurs from damage to the sacral venous plexus, branches of the internal iliac artery, the fracture surfaces, and surrounding soft tissue injury. Rapid external stabilization of pelvic fractures reduces venous bleeding and prevents disruption of formed clots; unfortunately, it has little effect on arterial bleeding.
  • Abrasions, briusing, and wounds over the pelvis or bleeding from the patient's rectum, vagina or urethra may indicate an open pelvic fracture.
  • Bruising on the flanks indicates retroperitoneal bleeding
  • The presence of pain in the pelvic area, including the lower back near the sacroiliac joint, groin, and hips combined with a large traumatic MOI indicates a potentially unstable pelvis.
  • An intact and stable pelvis is symmetrical; a rotated or elevated iliac crest indicates a serious fracture.
  • Evaluate rotational stability of the pelvis by pressing in and down (back) on the iliac crests, and by pressing posteriorly on the symphysis pubis. Feel for crepitus and movement (there should be none).
  • Isolated rotation of a lower extremity and/or a discrepancy in the length of a lower limb may be due to a hip injury, a femoral injury, or a vertically unstable pelvic injury.
  • If the lower extremities are uninjured, assess the vertical stability of the patient's pelvis by applying gentle manual traction to each leg.
  • Tenderness over the greater trochanter indicates an acetabular or femoral head injury.
  • Red-brown colored urine is due to the presence of red blood cells and indicates a significant injury (see photo). 

Treatment
Pre-hospital treatment focuses on external stabilization of the pelvic ring to reduce internal volume, bleeding, and pain. Rapid litter transport to a major hospital for definitive evaluation and surgery is essential for survival.

Two methods of improvising an effective pelvic splint are show below. Focus on understanding the structural concepts; the materials you use will vary depending on what is available.

Method 1: Pinning
Picture
  1. Use strips of cloth to tie the patient's feet together. This internally rotates the patient's hips, reduces internal pelvic volume, and helps increase the splint's overall stability.
  2. Carefully lift the patient and center a folded tarp (or other tough material) over the femoral trochanters and pubis; correct placement is critical.
  3. Pull, maintain tension, and using heavy-duty blanket pins, secure in place.
  4. If available, consider placing a thin inflatable sleeping pad between the tarp and the patient; inflate the sleeping pad after pinning to increase stability.
  5. Carefully lift the patient and secure them in a litter for transport.

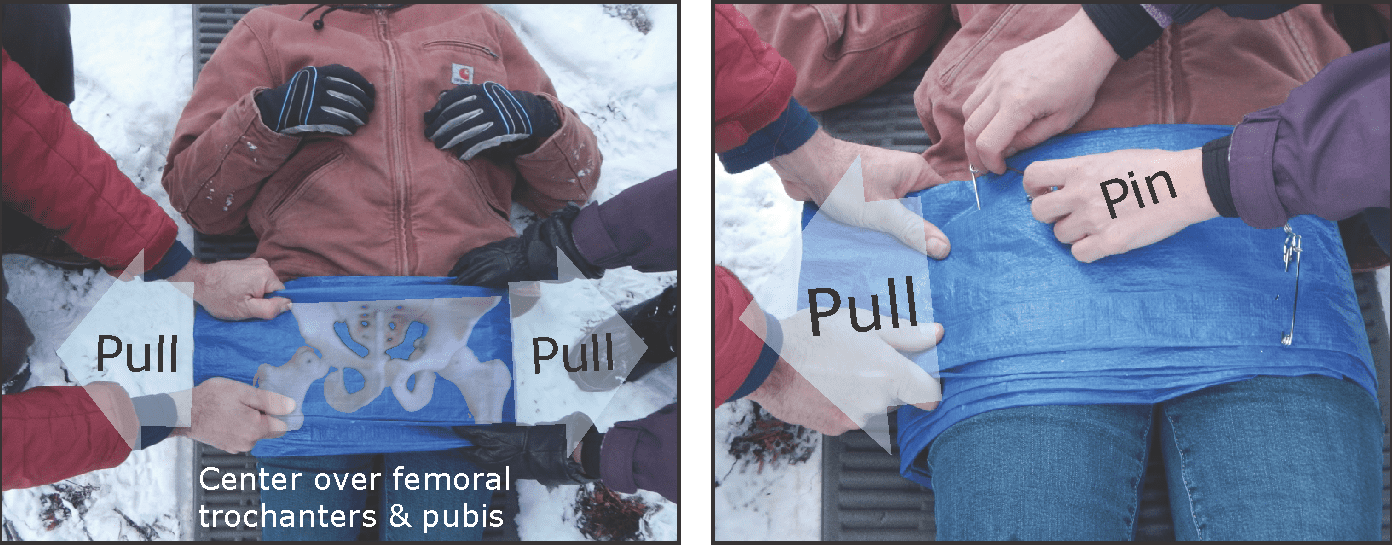
Method 2: Pelvic Corset
Picture
Picture
  1. Use strips of cloth to tie the patient's feet together. This internally rotates the patient's hips, reduces internal pelvic volume, and helps increase the splint's overall stability.
  2. Cut the leg from a pair of long pants or bibs (jeans were used in the above photos). Alternately, you may use any wide strip of tough cloth cut from a tarp, ground cloth, etc. Even a SAM splint will work (it's narrow so centering the splint over the pubis and trochanter needs to be precise).
  3. Cut two sticks the same width as the pant leg; they should be study enough to absorb and distribute pressure without breaking. Tent poles, pack supports, etc. may be used in place of sticks.
  4. Cut the other pant leg into strips 2-3 inches in width. You will need at least four strips; the actual number will depend on the overall width of the pant leg.
  5. Use two of the strips to tie the patient's feet together. This internally rotates the patient's hips, reduces internal pelvic volume, and helps increase the splint's overall stability.
  6. Carefully lift the patient and center the pant leg over the femoral trochanters and pubis; correct placement is critical.
  7. Fold each end of the pant leg over one of the sticks; overlap the stick by 3-4 inches.
  8. Cut at least two sets of holes next to the stick; keep the holes roughly 4 inches apart. The actual number of holes will vary depending on the width of the pant leg.
  9. Fold each of the cloth strips in half and girth them through a hole and around the stick on one side. Pass the ends of the strips through the holes and around the stick on the other side.
  10. Gently but firmly tighten and tie the cloth strips in place. If possible, tighten all the strips at once; this will require assistance from multiple people.
  11. Carefully lift the patient and secure them in a litter for transport.

Want more information on this and other wilderness medicine topics? Take one of our wilderness medicine courses. Guides and expedition leaders should consider taking our Wilderness First Responder course. Looking for a reliable field reference?

Find this information difficult to remember? Looking for a reliable field reference? Consider consider purchasing one of our print or digital handbooks; our digital handbook apps are available in English, Spanish, and Japanese. Updates are free for life. A digital SOAP note app is also available.

0 Comments

Your comment will be posted after it is approved.


Leave a Reply.

    RSS Feed

    Categories

    All
    1st Aid Kits
    Commentary
    Disaster Medicine
    Environmental Problems
    Epinephrine Auto Injector Laws
    Medical Problems
    Outdoor Program Mgt
    Pain Management
    Risk Mgt Case Studies
    Traumatic Problems
    WildMed Case Studies

    ​Our public YouTube channel has educational and reference videos for many of the skills taught during our courses. Check it out!
 Privacy Policy
  • Home
  • About Us
    • Mission, Vision, History, & Educational Strategies
    • Staff Profiles
  • Course Descriptions
  • Course Schedule
  • Recertification
  • Sponsor a Course
  • Store
  • Resources
    • Downloads
    • Links
    • Candidate Login
    • Instructor Login
  • Certification Database
  • Additional Services
    • Affiliate Program
    • Consulting
  • Contact Us
  • Blog
  • WMTC Japan
  • WMTC Colombia
  • COVID-19